Banner Employee Self-Service 8 vs. 9
Differences between Banner Employee Self-Service 8 vs. 9
You can use this document to learn the differences between the Banner Employee Self-Service 8 and the NEW Banner Employee Self-Service 9. The most significant difference is the Banner dashboard. Banner 9 uses the same menu items, but they have different looks and feel. This document will guide you on navigating the new dashboard to find menu items from the Banner version 8 listed below.
Personal Information
- View or Update Addresses and Phones
- View or Update E-mail Addresses
- View or Update Emergency Contacts
- Update Marital Status
- Name Change Information
- Social Security Number Change Information
Employee
- Ethnicity and Race Survey
- Veteran Survey
- Disability Survey
- Hourly/Student Employee Time Input
- Salaried Employee Time Input
- Pay Information
- Tax Forms
- Job Summary
- Leave Balances
- Faculty Load and Compensation
Login Information
- Go to my.njit.edu or portal.njit.edu and log in using UCID and UCID password.
- Click on Human Resources Services and then Banner Employee Self Service - by Ellucian link where you’ll be brought to the employee dashboard.
Dashboard
The Banner Employee Self-Service 9 dashboard has multiple sections. See the image below and explanations of all sections under the image.
Banner Employee Self-Service 9
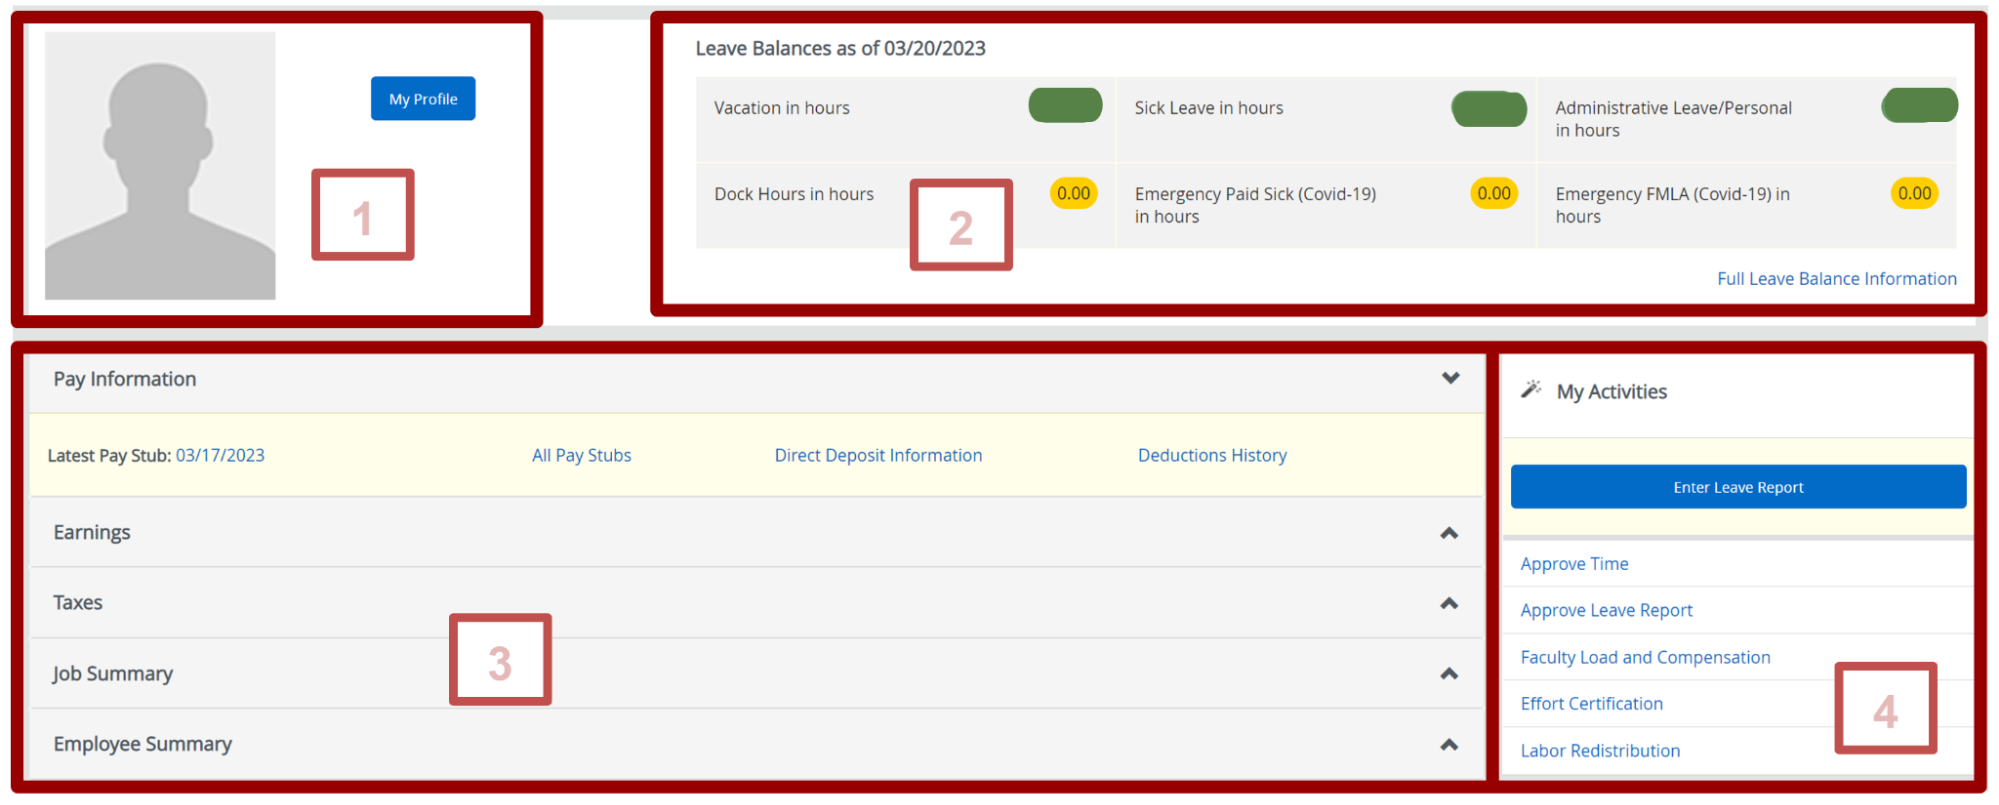 |
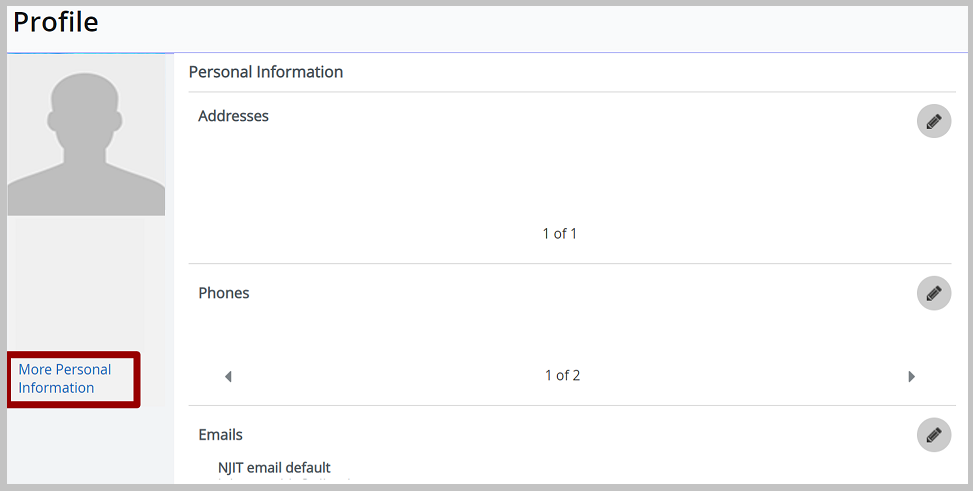
Section 1: From the top section, click the blue My Profile button in the left top corner to access the Personal Information, Ethnicity and Race Survey, Veteran Survey, and Disability Survey. Click the More Personal Information link under your profile picture to make changes.
|
|
Section 2: Click on the Full Leave Balance Information link in the top right section to find details about your leave balances, including vacation, sick leave, administrative leave, etc.
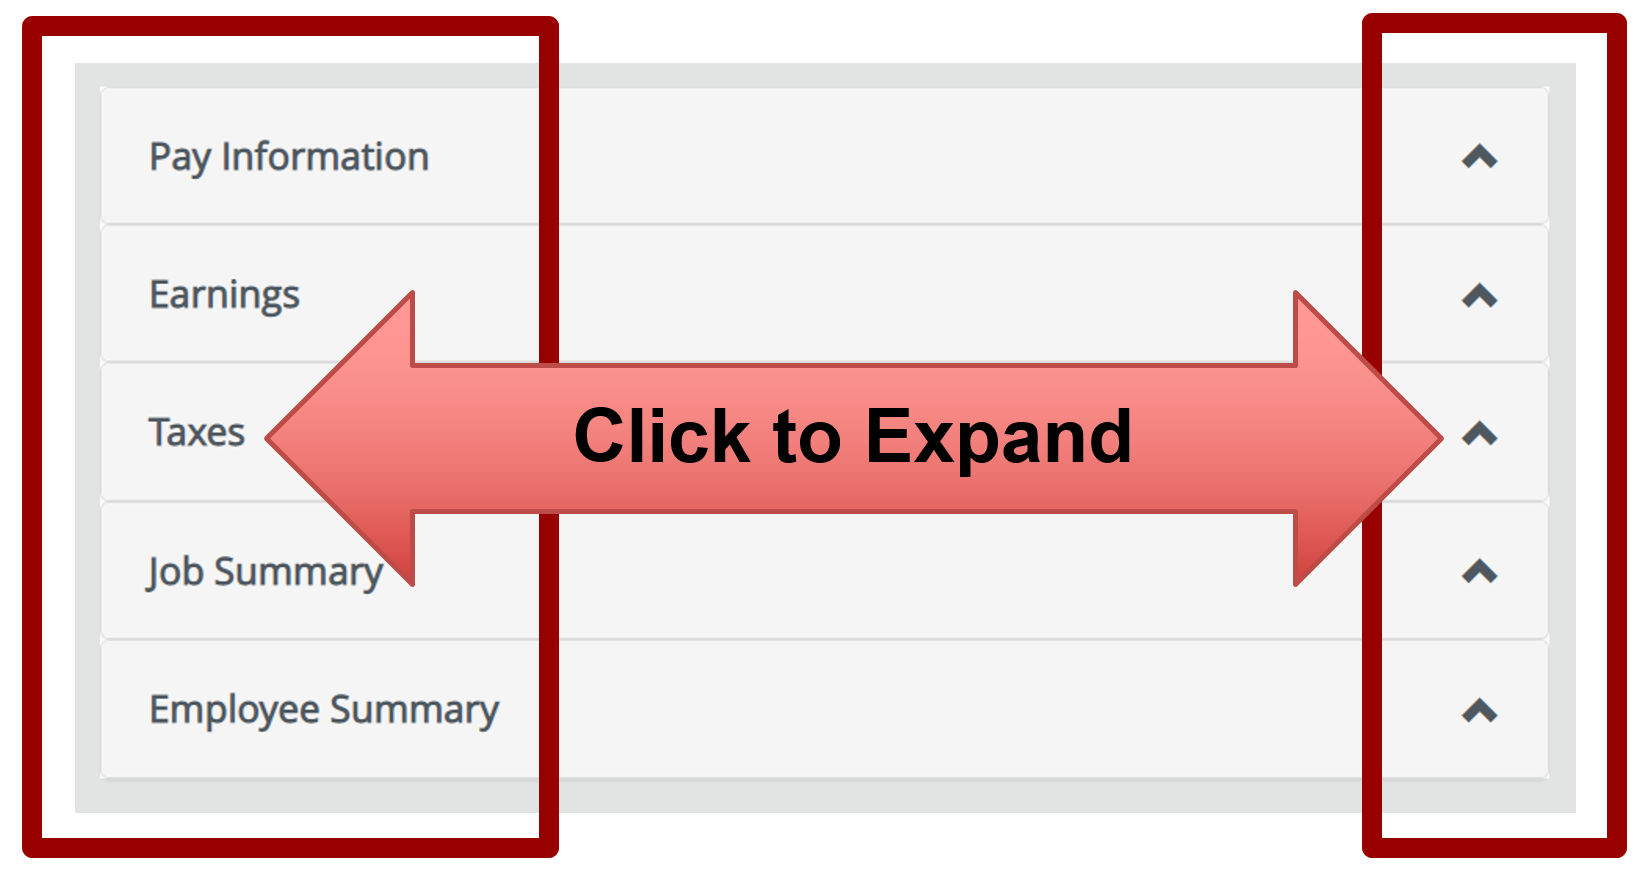
Section 3: Click on any items in this section to expand them and learn more about Pay Information, Earnings, Taxes, Job Summary, and Employee Summary. (You can also click on the arrow pointing up on the right side of the menu to expand the menu item).
 |
The expanded window will show you some summary information about your employment. For more detailed information, click on the item.
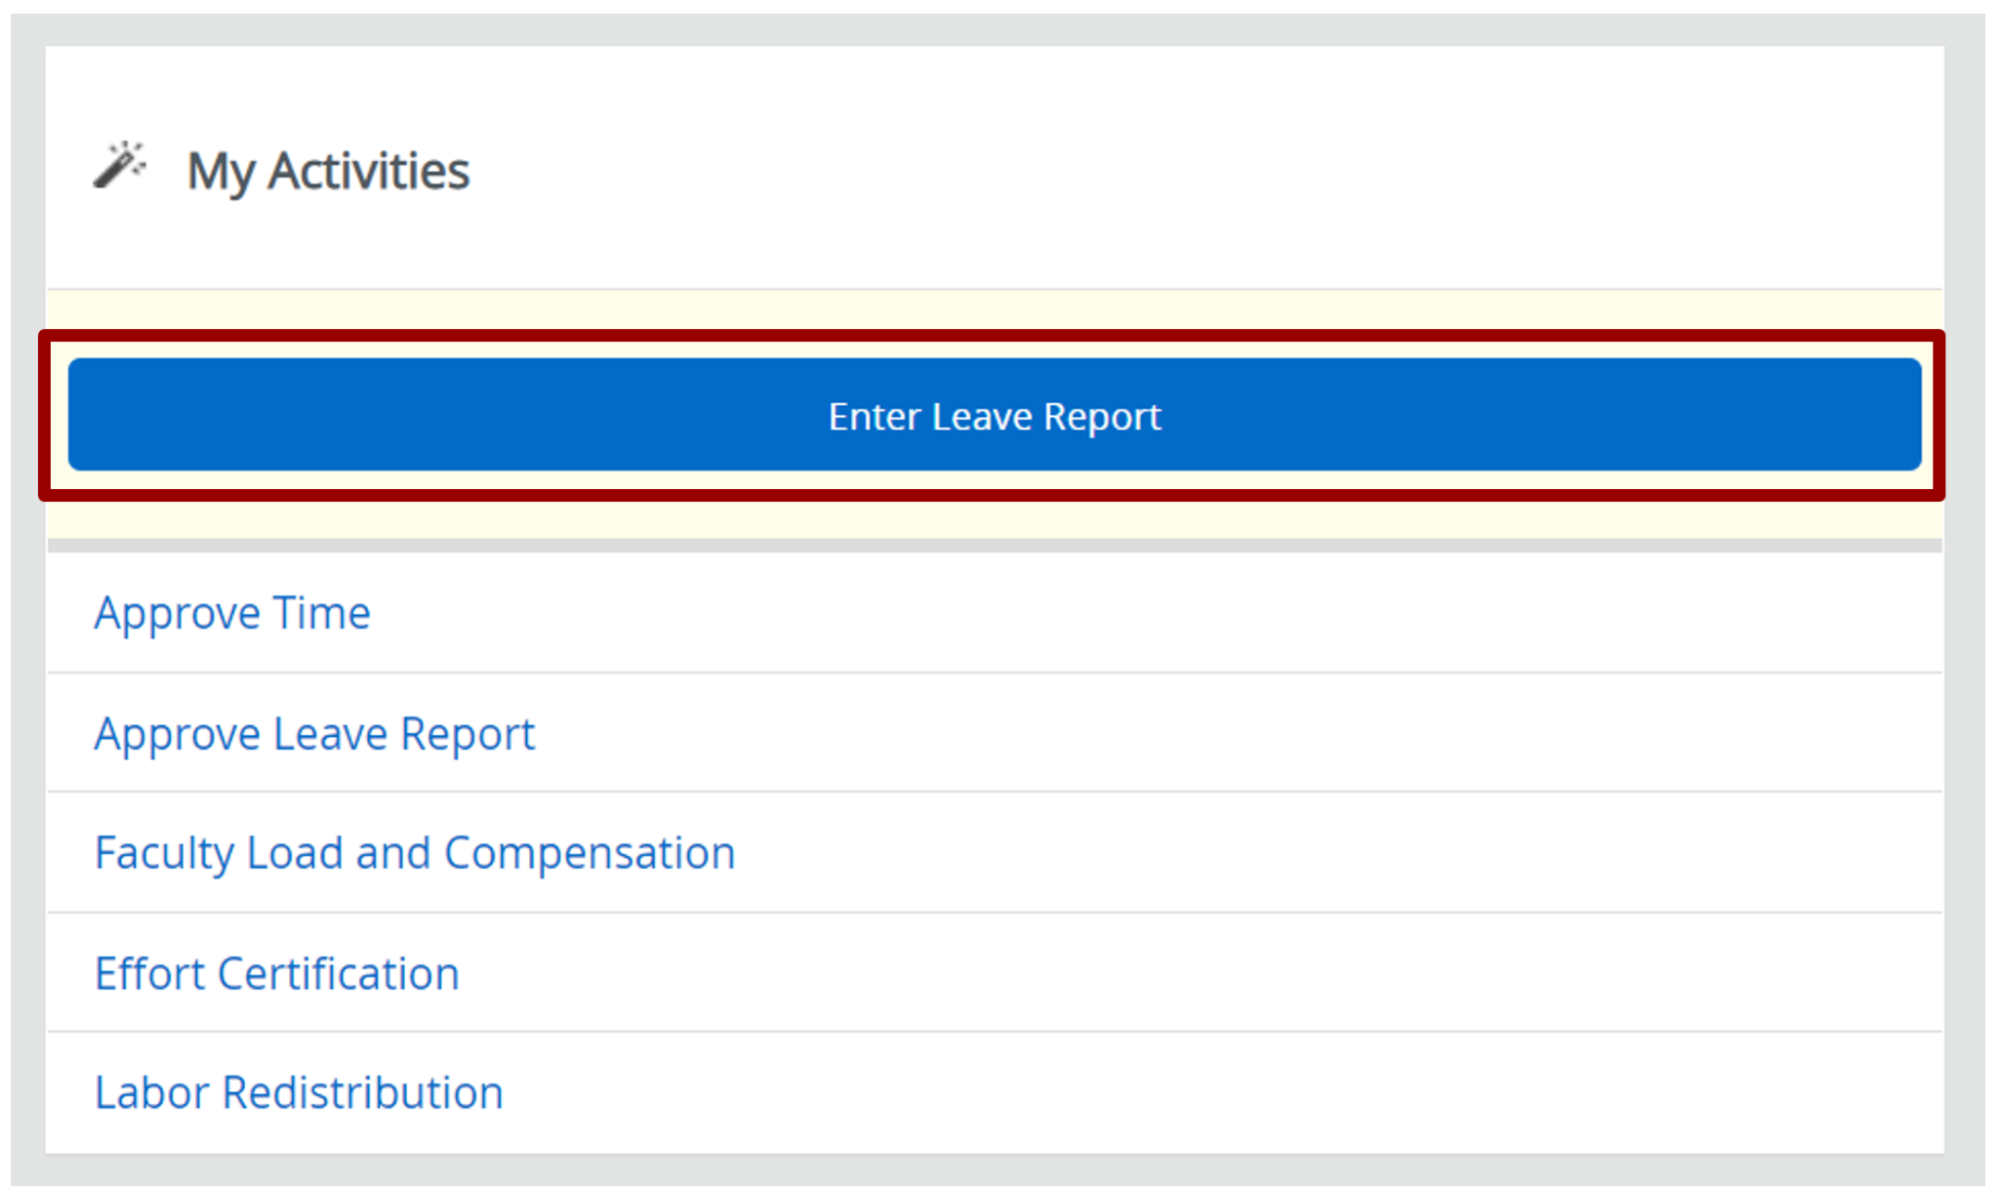 |
Section 4: Under My Activities, click the blue button Enter Leave Report to enter time off. The menu below the blue button will vary depending on your role in the university.
Location of Banner 8 Menu Items.
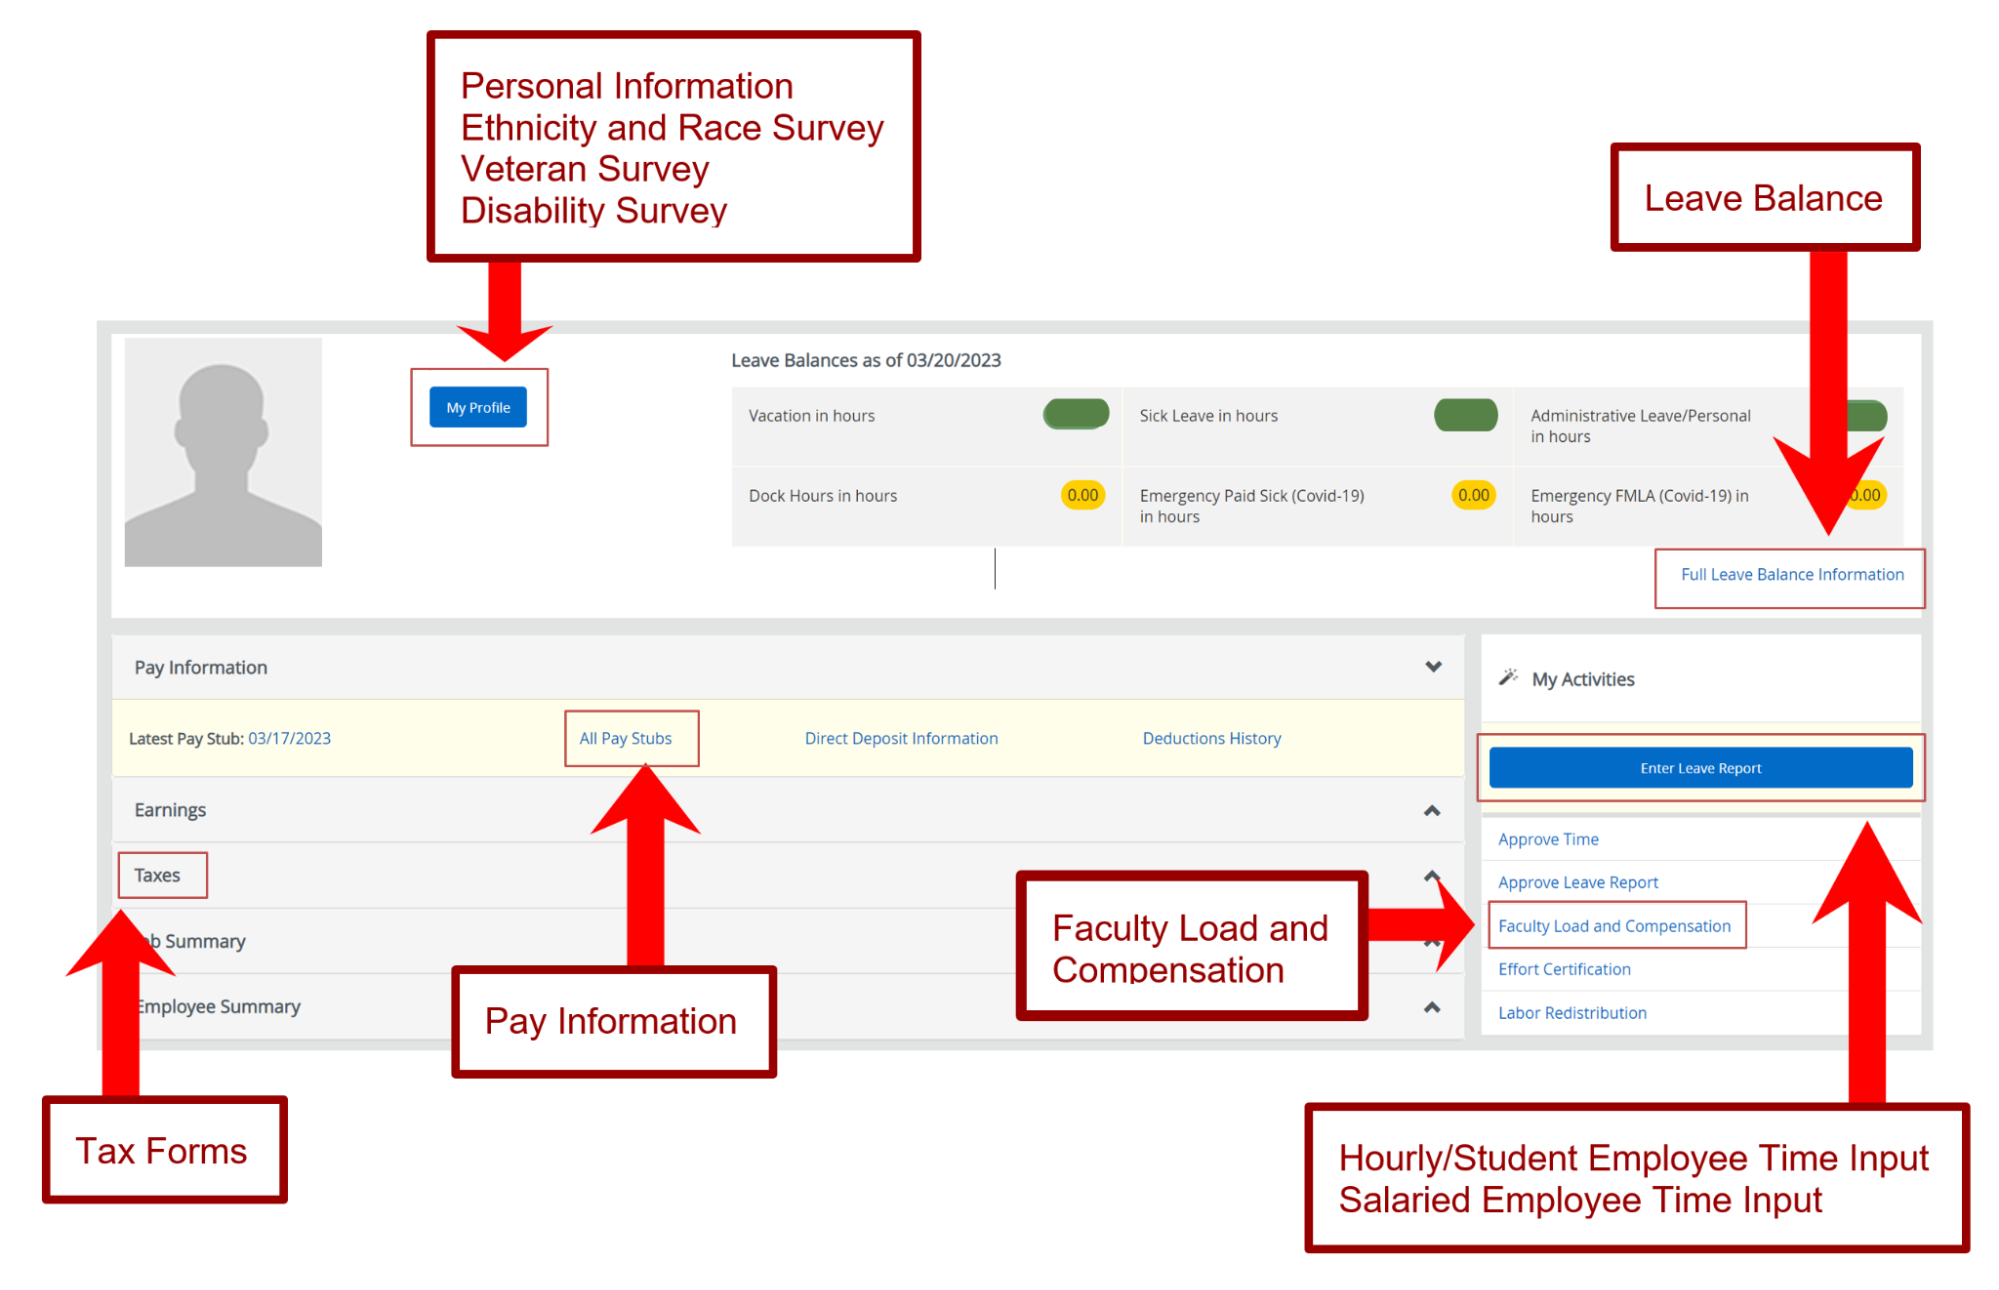 |
The table below will show you how to access and use all items from the Banner Employee Self-Service 9 dashboard.
Personal Information
| Items from Banner 8 | Directions to access Banner 9 items |
| View or Update Addresses and Phones |
1. Click the My Profile button. 2. Click the More Personal Information link under your picture on the window's left side. 3. Click the Add New button on the right of the Address or Phone Number section to add a new address or a personal phone number. |
| View or Update E-mail Addresses |
1. Click the My Profile button. 2. Click the More Personal Information link under your picture on the window's left side. 3. Click the Add New button on the right of the E-mail section to add a new e-mail address. |
| View or Update Emergency Contacts |
1. Click the My Profile button. 2. Click the More Personal Information link under your picture on the window's left side. 3. Click the Add New button on the right side of the Emergency Contact section to add new contact information. |
| Update Marital Status |
1. Click the My Profile button. 2. Click the More Personal Information link under your picture on the window's left side. 3. Click the Edit button on the right of the Personal Details section. 4. Click the arrow down under Marital Status to make changes. |
| Name Change Information | Please contact the Office of Human Resources for information on submitting or updating your name (https://nexus.njit.edu/). |
| Social Security Number Change Information |
Please contact the Office of Human Resources for information on submitting or updating your social security number (https://nexus.njit.edu). For additional information on how to apply for, replace, correct, or change your name on your social security card, please visit http://www.ssa.gov. |
Use the following buttons to change section items:
|
|
Employee Information
| Items from Banner 8 | Directions to access Banner 9 items |
| Ethnicity and Race Survey |
1. Click the My Profile button. 2. Click the More Personal Information link under your picture on the window's left side. 3. Scroll to the bottom of the screen to the Additional Details section. 4. Click the edit button under Ethnicity and Race. |
| Veteran Survey |
1. Click the My Profile button. 2. Click the More Personal Information link under your picture on the window's left side. 3. Scroll to the bottom of the screen to the Additional Details section. 4. Click the edit button under Veteran Classification. |
| Disability Survey |
1. Click the My Profile button. 2. Click the More Personal Information link under your picture on the window's left side. 3. Scroll to the bottom of the screen to the Additional Details section. 4. Click the edit button under Disability Status. |
| Hourly/Student Employee Time Input |
1. Click the Enter Time blue button at the right menu under the My Activities section. 2. Click on the Start Timesheets button on the right. 3. Click on the day that you would like to change. 4. Select from the Earn Code drop-down menu Student Hourly. 5. Enter how many hours you worked. |
| Salaried Employee Time Input |
1. Click the Enter Leave Report blue button under the My Activities section. 2. Choose the date and click the Start Leave Report button on the right. 3. Click on the day that you would like to change. 4. Select the Earn Code item from the drop-down menu, for example, Sick Leave. 5. Enter how many hours you used. 6. Click the Save button on the bottom right of the window. |
| Pay Information |
1. Click on the Pay Information section to expand it. When expanded, you should see the light yellow subsection under the Pay Information section. 2. Click the All Pay Stubs link. 3. Choose the Pay Year from the drop-down box and click on the date under the Pay Date to open. |
| Tax Forms |
1. Click on the Taxes section to expand it. You should see the light yellow subsection under the Taxes section when expanded. 2. Choose the form you want to view and click on it to open. Some forms may ask you for additional information. |
| Jobs Summary |
1. Click on the Job Summary section to expand it. You should see the light yellow subsection under the Job Summary section when expanded. 2. Click on the Job Information link on the right side of the section to view more information. |
| Leave Balances |
1. Click the Full Leave Balance Information link under the Leave Balances section. 2. View information about Vacation, Sick Leave, Administrative Leave/Personal, Dock Hours, Emergency Paid Sick (Covid-19), and Emergency FMLA (Covid-19). 3. If you want more information about one of the items listed above, click on the title. |
| Faculty Load and Compensation |
1. Click the Faculty Load and Compensation link under the My Activities section. 2. Click the Compensation and Acknowledgment button. 3. Choose the Term and click on the Go button. 4. Check the Faculty Acknowledgment box for each section you teach. |
For more information or questions about Banner Employee Self-Service 9, please contact the Office of Human Resources (https://nexus.njit.edu/).

